Widget là gì?
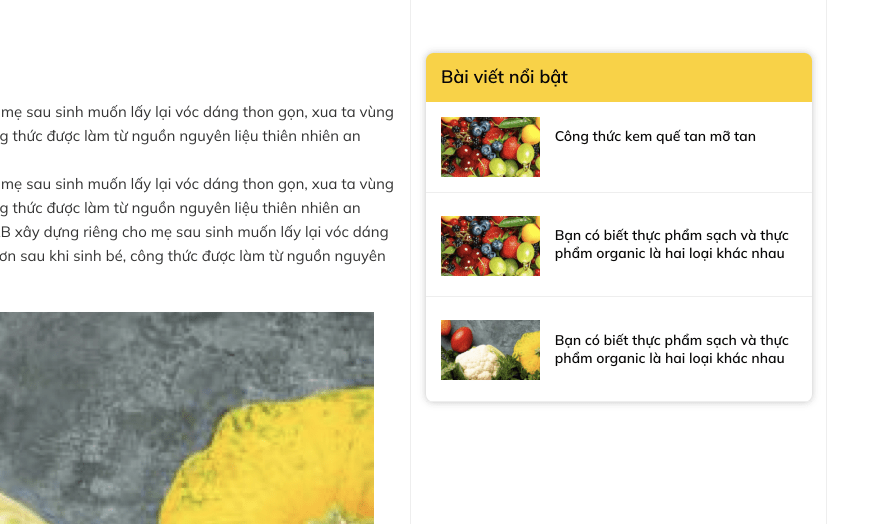
Widget là một thành phần phần mềm nhỏ, thường được sử dụng để hiển thị thông tin hoặc thực hiện một chức năng cụ thể trên giao diện người dùng. Widget thường được đặt trên desktop, trên trình duyệt web hoặc trên các ứng dụng di động.
Một số ví dụ về widget bao gồm:
- Widget thời tiết: Hiển thị thông tin thời tiết trong khu vực người dùng đang sinh sống hoặc trong một địa điểm được chỉ định.
- Widget lịch: Hiển thị lịch với các sự kiện được lên lịch, các ngày nghỉ và các ngày lễ.
- Widget trò chuyện trực tuyến: Cho phép người dùng trò chuyện với những người khác trực tuyến một cách thuận tiện mà không cần mở ứng dụng riêng.
- Widget phương tiện truyền thông: Hiển thị các bài viết mới nhất, video hoặc âm thanh trên trang web mà không cần truy cập vào trang web đó.
Widget được sử dụng rộng rãi trong các ứng dụng web, desktop và di động để tạo ra trải nghiệm người dùng thuận tiện và tối ưu hóa tốc độ truy cập thông tin.
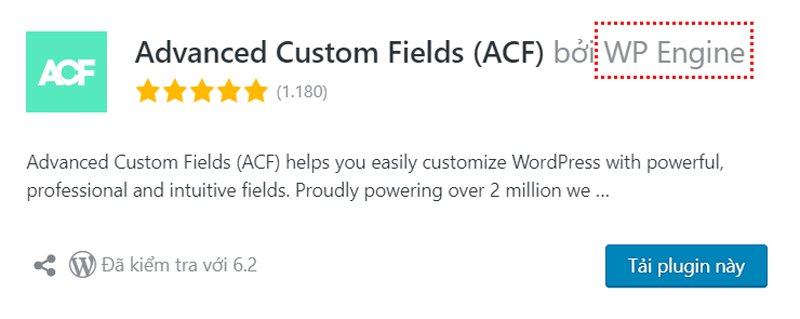
Cài đặt plugin ACF (Advanced Custom Fields)
Cách tạo Widget WordPress bài viết
Cách 1: Tạo trường Checkbox nổi bật cho bài viết với ACF
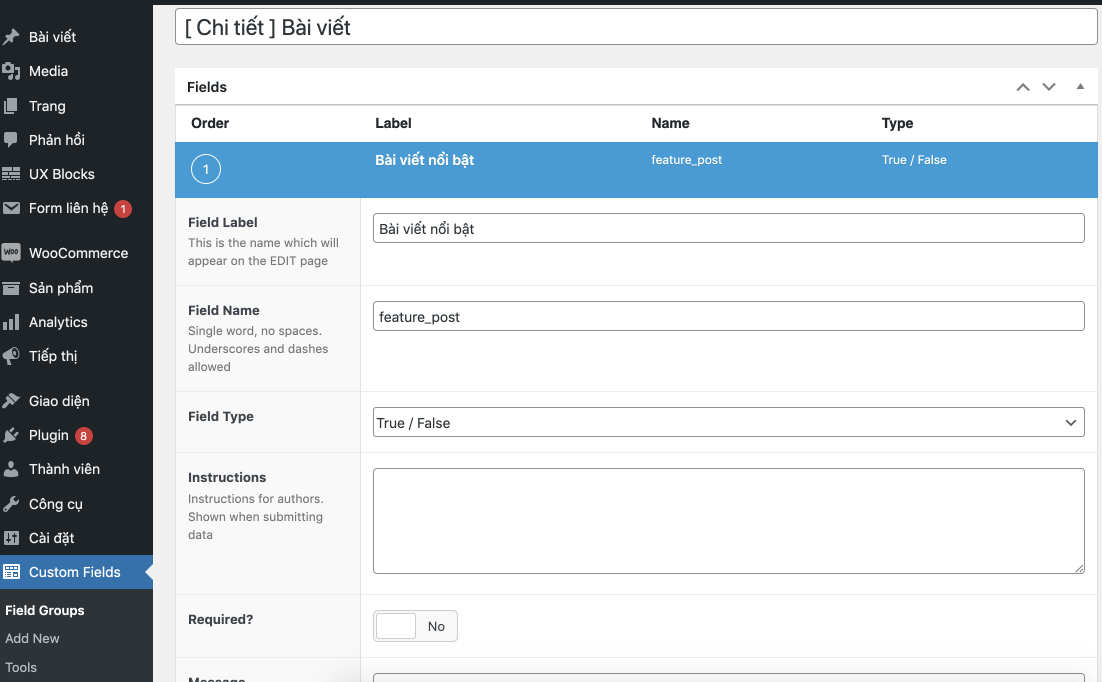
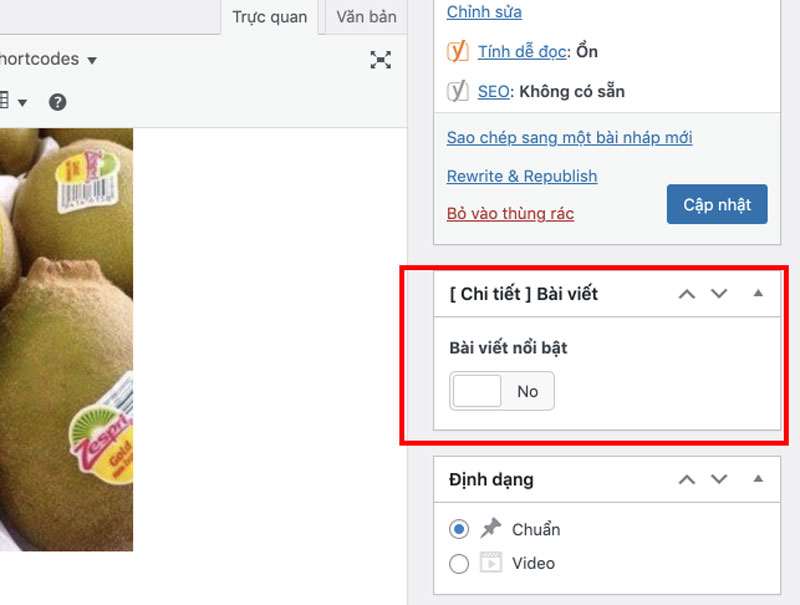
Đầu tiên, bạn vào cài đặt Plugin ACF sau đó -> Chọn Add New để tạo field mới. Sau đó làm theo như ảnh sau đó save.
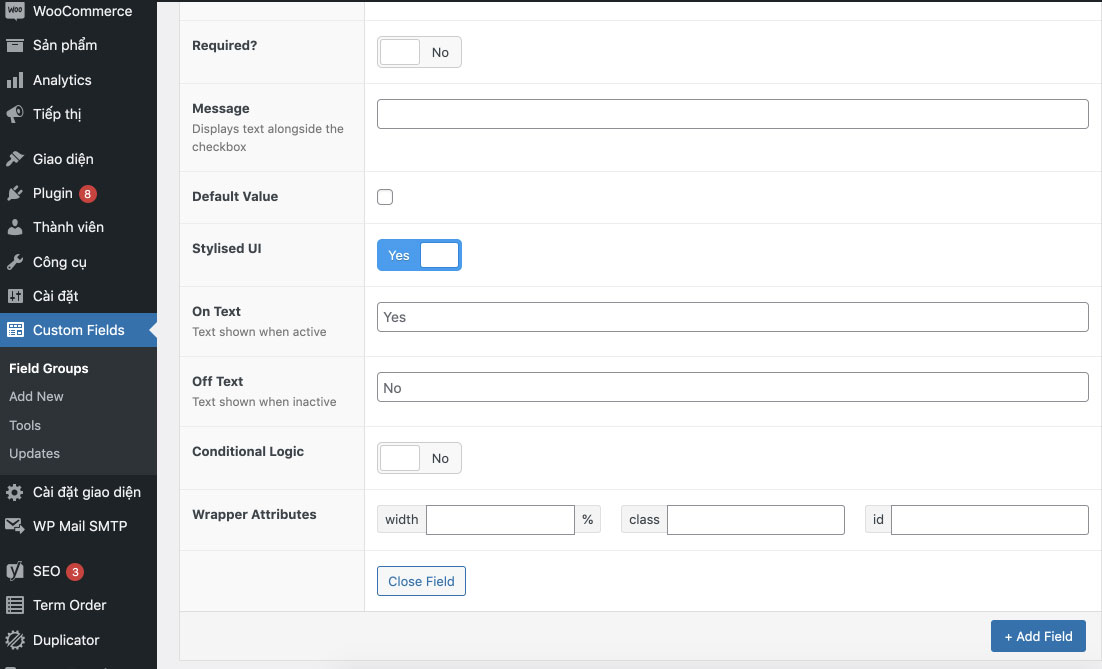
Kết quả hiện thị trong bài viết như sau:
Bước 2: Dùng code bên dưới gắn vào file function.php
class bai_viet_noi_bat extends WP_Widget
{
     function __construct(){
        $widget_ops = array('description' => 'Bài viết nổi bật');
        $control_ops = array('width' => 300, 'height' => 300);
        parent::__construct(false,$name='Bài viết nổi bật',$widget_ops,$control_ops);
    }
    function form($instance){
        global $wpdb;
        //Defaults
        $instance = wp_parse_args( (array) $instance, array('title'=>'','numbershow'=>'') );
        $title = htmlspecialchars($instance['title']);
        $numbershow = htmlspecialchars($instance['numbershow']);
        ?>
        <p><label for="<?php echo $this->get_field_id('title'); ?>">Tiêu đề </label>
        <input type="text" name="<?php echo $this->get_field_name('title'); ?>" id="<?php echo $this->get_field_id('title'); ?>" style="width:100%" value="<?php echo $title; ?>">
        </p>
            <p><label for="<?php echo $this->get_field_id('numbershow'); ?>">Số lượng bài viết: </label>
        <input type="text" name="<?php echo $this->get_field_name('numbershow'); ?>" id="<?php echo $this->get_field_id('numbershow'); ?>" style="width:100%" value="<?php echo $numbershow; ?>">
        </p>

<?php

    }
    /*Saves the settings. */
    function update($new_instance, $old_instance){
        $instance = $old_instance;
        $instance['title'] = stripslashes($new_instance['title']);
        $instance['numbershow'] = stripslashes($new_instance['numbershow']);
        return $instance;
    }
    function widget($args, $instance) {
        global $wpdb,$post, $product;
        extract($args);
        $title= empty($instance['title']) ? '' : $instance['title'];
        $numbershow= empty($instance['numbershow']) ? '' : $instance['numbershow'];
        echo $before_widget;
        if ( ! empty( $instance['title'] ) ) {
            echo $args['before_title'] . apply_filters( 'widget_title', $instance['title'] ). $args['after_title'];
        }
        ?>
        <div class="news__feature widget-post">
            <ul>
            <?php
                $args = array(
                'post_type' => 'post',
                'posts_per_page' => $numbershow,
                'post_status' => 'publish',
                'meta_query' => array(
                    array(
                      'key' => 'feature_post',
                      'value' => '1',
                      'compare' => '==' // not really needed, this is the default
                    )
                  )
                );
                $wp_query = new WP_Query( $args );
                $i=1;
                if ( $wp_query->have_posts() ) :  while ( $wp_query->have_posts() ) : $wp_query->the_post();  ?>

                <li>
                    <a href="<?php the_permalink(); ?>" class="plain">

                    <div class="box-image">
                        <?php the_post_thumbnail('full'); ?>
                    </div>
                    <div class="box-text text-left">
                            <h5 class="post-title is-large "><?php the_title(); ?></h5>
                    </div>
                    </a>
                </li>
            <?php

            $i++;endwhile;

             wp_reset_postdata();
            endif;


            ?>
        </ul>

    </div>
         <?php
        echo $after_widget;
        ?>
       <?php
        }
}// end class
register_widget('bai_viet_noi_bat');
Bước 3 : Dán code css bên dưới vào file style.css
.widget .widget-title {
    font-size: 18px;
    font-weight: 600;
    text-transform: initial;
    color: black;
    letter-spacing: 0;
    background-color: #FED201;
    border-radius: 8px 8px 0 0;
    display: block;
    padding:15px;
}
aside.widget  {
    background: #FFFFFF;
    box-shadow: 0px 0px 7px rgba(0, 0, 0, 0.25);
    border-radius: 8px;
}
aside.widget ul li {
    padding: 0 15px;
}
aside.widget ul li a {
    color: #222;
    font-size: 14px;
    font-weight: 500;
}
aside.widget ul li a:hover {
    color: #fed203;
}
.widget-post ul li {
    padding: 15px !important;
    border-bottom: 1px solid #eee;
}
.widget-post ul li a {
        width: 100%;
    -js-display: flex;
    display: -webkit-box;
    display: -ms-flexbox;
    display: flex;
    -webkit-box-orient: horizontal;
    -webkit-box-direction: normal;
}
.widget-post ul li .box-image {
    width: 45%;
    padding-right: 15px;
}
.widget-post ul li .box-image img {
    height: 60px;
    object-fit: cover;
}

.widget-post ul li h5 {
    font-weight: 600;
    font-size: 14px;
}
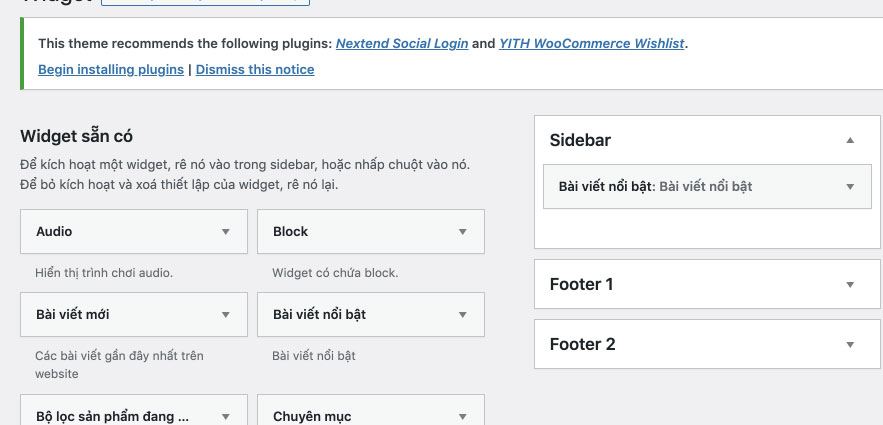
Đến đây, bạn đã thành công bước đầu trong cách tạo widget wordpress rồi. Sau khi dán code xong bạn có thể vào widget để kéo thả vị trí thả widget mà bạn muốn hiện thị ở trên web ở mục Giao diện -> Widget
Cách 2: Tạo bài viết tùy chọn với ACF Relationship (Updating…)
Xong rồi save lại và xem kết quả thôi. Chúc các bạn thành công, nếu thắc mắc trong quá trình cài đặt vui lòng comment bên dưới của TMO Agency nhé!

Bài viết liên quan